

If images sell the click, the rules keep the click from slipping away. That is why I treat Google Merchant Center image requirements as one of the fastest ways to protect visibility, avoid disapprovals, and lift Shopping performance. I aim for clean, accurate, fast-loading images that match the exact SKU the ad promotes. Simple idea, easy to miss in practice. I will walk through what matters, where teams slip, and how to run a repeatable system that keeps a catalog healthy without constant babysitting.
Google Merchant Center image requirements
Here is the at-a-glance summary I use during reviews. It tracks to policy and covers the gotchas that trigger manual and automated checks. For deeper policy detail, see Google’s guidance on high quality images and the rule that ads require an image with an unobstructed view.
- Minimum dimensions: non-apparel at least 100 by 100 pixels; apparel at least 250 by 250 pixels.
- Competitive sizes: 800 pixels or larger on the shortest side; I aim for 1200 to 1600 pixels on the long edge for crisp zoom.
- File weight: 16 MB or less; keep total pixels under 64 megapixels.
- Accepted formats: JPEG, PNG, non-animated GIF, WebP, BMP, TIFF.
- Content rules: no text overlays, watermarks, borders, or frames. Show the product only on a clean background.
- One product per main image. Multipacks and bundles must show the exact contents sold.
- Exact variant match: the color, size, material, and pattern must match the selected SKU.
- Use additional_image_link for extra angles, detail shots, lifestyle scenes, and packaging.
- Align to adult content rules when relevant and mark the adult attribute when required.
- Keep the landing page in sync. The image, variant name, and color label should match your product page.
I avoid disapprovals by pairing high-quality images with high-quality product data and consistent landing pages. If the price, color name, or variant in the photo differs from the page, users leave and the feed can be flagged. Policies evolve, so I confirm the latest Merchant Center documentation before major catalog changes and ensure my site meets landing page requirements.
Image formats
Merchant Center accepts JPEG, PNG, non-animated GIF, WebP, BMP, and TIFF. In practice, JPEG and WebP cover almost all needs.
- I choose JPEG for a reliable balance of quality and size. Use high-quality settings to avoid blocky compression and color banding.
- I use WebP when I want smaller files at the same visual quality. In many catalogs, WebP reduces file size by roughly 25 to 35 percent compared with JPEG at comparable quality.
- Keep GIFs non-animated. Animated GIF is not allowed for product images.
- Use sRGB color space. Convert CMYK or Adobe RGB to sRGB before upload so colors match what users see in search results.
- Retain correct orientation. If you strip EXIF data during compression, rotate and save the image in the proper orientation before upload.
- Watch for artifacts. Heavy compression kills trust, especially on high pixel density screens. Keep edges sharp and colors even.
A quick workflow that works well for me: export a high-quality JPEG at 85 to 92 quality, sRGB, long edge 1200 to 1600 pixels. If file size is still heavy, test WebP at a visually lossless setting and compare.
Image URL requirements
The image_link attribute should resolve to a direct, stable, crawlable URL that returns HTTP 200. Stability matters as much as speed.
- Use a direct binary file URL - not an HTML page that wraps an image.
- Include http or https (use HTTPS in nearly all cases).
- Avoid session IDs, dynamic cookies, or signed URLs that expire too fast.
- Do not block the image directory in robots.txt.
- Allow Google’s fetchers in your firewall, CDN, and hotlink rules.
- Prefer short, clean URLs. Limit redirects. If you must redirect, use a single 301 for permanent changes.
- Set sensible cache headers and the correct Content-Type (for example, image/jpeg). This speeds recrawls and reduces stale images.
- When you change an image, update the URL or append a cache-buster query parameter to force a refresh.
Troubleshooting common fetch errors
- 404 or 410: file missing. Confirm path, filename, and case sensitivity. Reupload or correct the feed URL.
- 403: blocked. Check robots.txt, CDN hotlink protection, IP blocking, and referrer rules that may deny Google’s fetcher.
- 5xx: server error. Check CDN origin health, timeouts, or rate limits. Reduce image size if processing is slow.
- Timeouts: heavy files or slow origin. Compress images, tune CDN caching, and confirm TCP/TLS settings.
- Endless 302 chain: stabilize the final URL. Replace with a direct 200 URL or a single 301 rule.
A quick note that saves headaches: many teams optimize page load and forget bot access. A strict CDN rule or signed URL with a short TTL can make images unusable for crawlers even if pages load fine for users. I treat bots as a first-class client for image delivery.
What to avoid with product images
These map straight to Merchant Center policies and are easy to spot in reviews. See Google’s policy page on images with an unobstructed view for examples, and troubleshooting overviews like this article.
- Promotional text, badges, or stickers layered on top of the photo
- Watermarks or logos that block any part of the product
- Decorative borders or frames
- Collages or multiple different products in one main image
- Placeholders like “image coming soon” or generic icons
- Excessive whitespace or odd crops that hide product edges
- Misleading props or accessories not included in the sale
- Graphic or sexual images without the adult attribute
- Low resolution, blur, heavy filters, or harsh vignettes
- Wrong variant photo such as a red shoe shown for a blue SKU
My fix-it sequence
- Identify the exact policy line the image breaks.
- Source a clean, high-resolution photo of the exact SKU.
- Remove overlays and borders in an editor, or retake the shot.
- Re-export to sRGB at the right size, then reupload.
- Update image_link to force a refresh and request a review in Merchant Center.
- Confirm product page copy and color names match the image exactly.
Product image size
The minimums keep you compliant. The recommended sizes keep you competitive. For more context, see the community thread on Google Merchant Center Image Size Requirements.
- Non-apparel: at least 100 by 100 pixels (bare minimum).
- Apparel: at least 250 by 250 pixels.
- Competitive range: 1200 to 1600 pixels on the long edge for crisp zoom and sharp mobile rendering; keep the shortest side at 800 pixels or more when possible.
- Avoid upscaling. It exaggerates blur and noise. Start with a larger source photo.
- Maintain a consistent aspect ratio across the catalog. A 1:1 square works well in most Shopping layouts, but 4:5 or 3:4 can also work if you keep it consistent.
- Frame the product to fill about 75 to 95 percent of the canvas. Leave a small margin to avoid cramped edges.
- Use a clean, even background. White or very light gray avoids color casts and keeps the product the hero.
- Standardize shadows. A soft, subtle shadow reads as real and avoids that cutout look.
- Check small-screen legibility. Fine details can vanish on a phone. If tiny parts matter, include a close-up in additional_image_link.
A quick sizing tension that resolves fast: bigger is usually better, yet giant files slow fetch and reloads. The sweet spot is a large, sharp image with modern compression. Most catalogs hit it with a 1200 to 1600 pixel long edge, efficient JPEG or WebP, and file sizes well below 300 KB.
Google Shopping images: practical tips
This is the habit layer - day-to-day moves that keep performance steady while staying within policy.
- Use an authentic, product-only main image. Save lifestyle scenes for secondary images so shoppers see the SKU first.
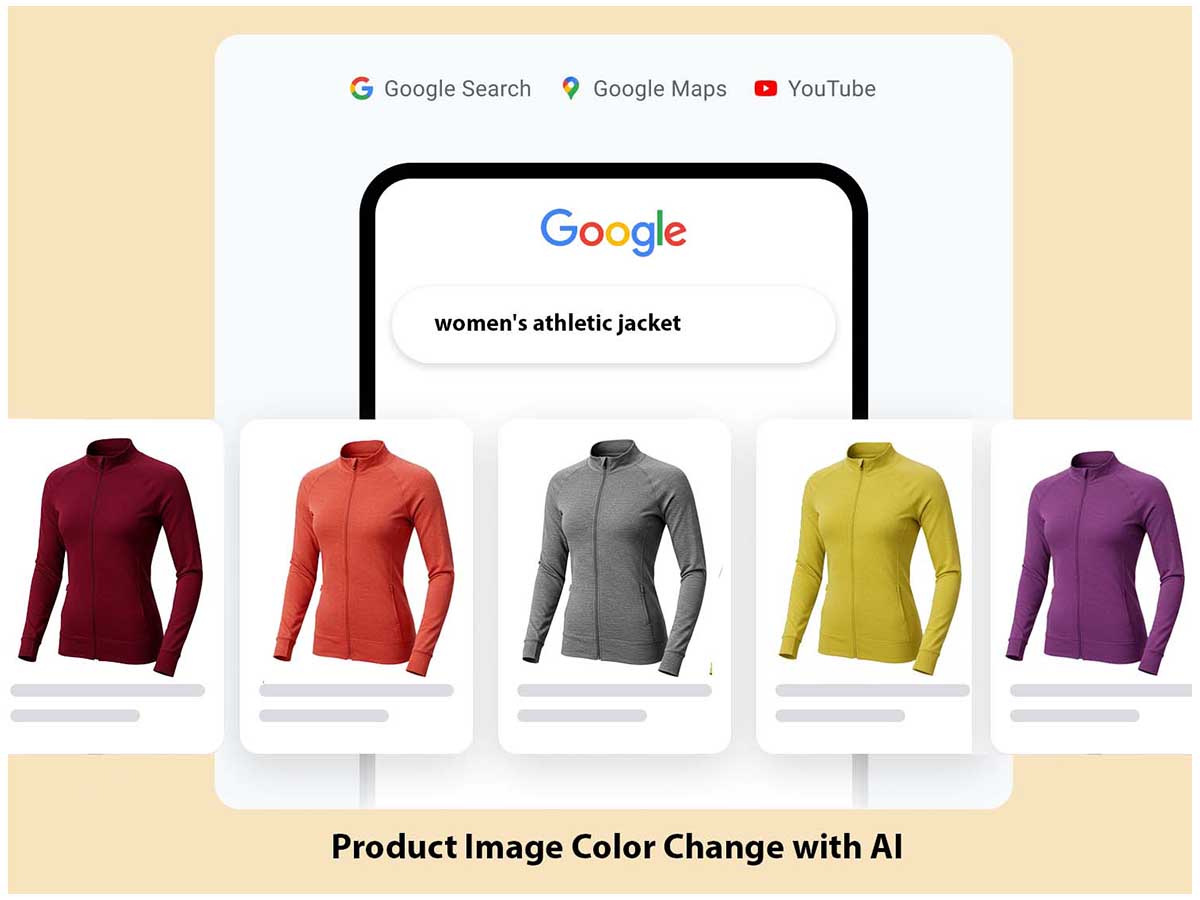
- Map each variant to its own image. Maintain a color-to-image table so the red jacket never shows up for the blue SKU.
- Match images to the landing page variant. Names like “Midnight Sky” should not translate to “Dark Blue” on the ad side. Support this with on-page structured data markup.
- Add up to 10 extras with additional_image_link. Include back and side angles, close-ups of texture or stitching, a scale shot, and a lifestyle scene.
- Keep lighting color-accurate. Guessing a color from a yellow-lit photo is frustrating - especially for apparel, paint, and cosmetics.
- Standardize backgrounds, margins, and file naming conventions across the catalog. It reads as premium and reduces QA time.
- When resources are thin, consider Google’s feature to Allow Merchant Center to improve your product images or third-party rundowns of how Google can automatically improve uploaded images, then replace with studio images as they become available.
- Audit disapprovals weekly. Fix the root cause, not just the single image. Update the process so the issue does not slip back in.
- Pair image work with accurate product data. GTIN [gtin], title [title], Google product category [google_product_category], and a consistent ID [id] often lift impressions and clicks alongside cleaner photos.
If I am refining titles, categories, and GTIN coverage at the same time, I keep copy and visuals in sync so the promise in the ad matches the experience on the page. The Content API can help keep availability and price current across variants.
A/B testing
Testing images is not guesswork. A simple framework keeps wins scalable and noise low. Some research suggests lifestyle images can lift CTR in certain contexts Out of the random group of people tested, 82% - but always test in your category.
- Build a clean split. Use a custom_label to tag a test cohort of SKUs, then swap image_link with a supplemental feed for those items only.
- Test by theme, not chaos: lifestyle vs. plain, straight-on vs. three-quarter angle, white vs. light-gray background, tight vs. medium crop.
- Run each cohort for 2 to 4 weeks so there is enough click and conversion volume to read a lift.
- Measure at the product group and item level in Google Ads and Merchant Center reports. Track CTR, conversion rate, and ROAS. CTR often moves first; conversion rate confirms how honest the image is to the landing page.
- Keep a simple log of winners and losers. When a pattern emerges, roll the winner to the full set in that category.
- Avoid mid-test edits to price or titles for those SKUs. If a change is unavoidable, note the date so results can be segmented.
Small visual tweaks can punch above their weight. A cleaner angle or brighter background can lift CTR by several points without a single change to bids.
AI-generated images
AI can fit into this workflow and stay compliant. Accuracy and restraint matter more than novelty.
- I keep the main image real when possible. Product photos build trust, especially for premium items. AI can edit backgrounds or fix minor flaws.
- If I use synthetic scenes, they must depict the exact SKU - no conceptual renders that differ from the item shipped.
- I never add text, stickers, or logos in the generated image. Overlays are still not allowed.
- I avoid unrealistic reflections, extreme shadows, or impossible materials. If it looks fake, users bounce and reviews suffer.
- AI is useful for quick cleanup: background removal, dust cleanup, and lighting balance.
- I put AI-enhanced or lifestyle variations in additional_image_link and keep the main image conservative and accurate.
- I keep my source files and version history. If an image is questioned, provenance and exact edits matter.
- I avoid third-party IP. No protected logos or trademarks in synthetic scenes.
- When tools embed metadata signaling synthetic editing, I leave it intact. Transparency is smart policy and helps during audits.
If I experiment with built-in generative tools, I use a short QA checklist for realism and policy compliance. One pass can scan a large batch once the pattern is clear.
A short wrap on risk management
- Policy fit: audit against Merchant Center image requirements before upload.
- Accuracy: confirm SKU, color name, and variant mapping match the page.
- Access: confirm the URL returns HTTP 200, is not blocked, and is cached well.
- Quality: test on mobile, check for compression artifacts, and confirm sharpness after resizing.
Seasonal note for big pushes: busy retail periods strain servers and people. I prepare image changes a week early, preload the CDN, and lock naming conventions for the final week. This reduces avoidable disapprovals when it matters most.
A final thought for leaders who track ROI
Crisp images do more than pass a policy check. They can raise CTR, which improves relevance signals and helps bids work harder. They reduce user confusion, which steadies conversion rate. And they cut tickets to support when customers receive the exact thing they saw. All of that sits downstream of one habit: follow Merchant Center image requirements with care, then make it a repeatable process that runs without micromanagement. The result feels simple - more qualified clicks, fewer headaches, and a catalog that keeps pulling its weight while you focus on bigger moves.


.svg)

.svg)
.svg)